


Traditional Microfilm Conversion vs. Digital ReeL
You’re looking around for ways to scan your microfilm reels and microfiche sheets into an electronic format, but you’re not sure which way is best, right? Unfortunately, the world of microfilm conversion doesn’t have a lot of user reviews like you would find on Amazon or Yelp. It’s a niche industry and is somewhat clouded in mystery because of the material itself; most microfilm was created decades ago and a lot of people these days don’t know what it is or how to use it!
What we’ll do for you here is provide an overview of two solutions to scan your microfilm into a digital format: a “traditional microfilm conversion” and a “Digital ReeL microfilm conversion.”
We’ll describe what each solution means and then go into the similarities and differences between the two. Our goal is to give you the information you need to make an informed decision about your digital scanning project, not necessarily push you towards one solution over the other.
Yes, Digital ReeL is our product and we’d love if you decided to use it, but we provide both Digital ReeL conversion services as well as traditional scanning solutions. We want to help you complete a successful project, whichever option you choose.
What’s A Traditional Microfilm Conversion?
Within BMI we refer to many projects as “traditional conversions.” Because we have our homegrown product, Digital ReeL (which we’ll define in the next section), as an option when working with our customers, we use the term traditional conversion to differentiate the two.
Here’s the mile-high description of a traditional conversion: scanning microfilm and microfiche records into a standard digital format (such as PDF or TIF), indexing the records at the page or file level, and accessing the records via an electronic database, such as a network share drive or an electronic document management system.
When you look at it this way, it’s really quite simple! And in many cases this is a great solution for your digital needs.
What’s Digital ReeL?
Digital ReeL is an application primarily for housing archival microfilm and microfiche records. It provides an exact replica of your original material so that you can have the true historic record at your fingertips and not be worried that you lost any images or data.
Although it’s our premier digital conversion solution now, we actually created Digital ReeL by accident. We were using an internal quality checking tool that displayed ribbons of microfilm after scanning; the purpose was to resolve the common problem of microfilm scanners missing images on poor quality film. While using the tool, one of our employees spoke up and said “this should be a product.” Once that lightbulb went off, our sales folks started discussing the idea with many of our clients and they, too, thought it was a great idea. Over a decade later that idea’s proved it’s worth, with hundreds of our clients using the application for their data needs.
The Major Difference Between A Traditional Microfilm Conversion And Digital ReeL
Boiling it down to one key difference between a traditional microfilm conversion and Digital ReeL is the user’s ability to see the original record in Digital ReeL as it existed in physical form and being able to verify that all your images and data were captured.
There are other factors that differentiate the two options, which are provided below in an infographic as well as listed out with details. Read on to learn more!

Key Aspects Of A Digital Conversion
Going the route of traditional microfilm scanning will almost always get you a non-proprietary format digital image. It just makes sense, because the standard output for these projects is a PDF, TIF, or JPG image. This is useful because you can take the now-digital images that have been scanned and converted from your microfilm and microfiche records and use them as-is (such as on a shared network drive) or import them into an electronic document management system. You can even just pop them into Google Drive if you think that’s the best way!
Digital ReeL as an application is of course proprietary, but the twist here is that although you may use it for primary file access or as a backup, you have the ability to export non-proprietary image files such as PDF, TIF, and JPG. With Digital ReeL you’re getting the best of both worlds: a sleek, simple digital image archive system as well as the choice to export images as you see fit. We’ve had many clients use Digital ReeL as a tool to optimize their images using the enhance feature, then export the optimized image and import into their other database. Nothing wrong with that! We’re happy to help you however we can.
What we mean by global text search is the ability to search an entire database for an index value or a keyword/phrase on the digital images.
After a traditional microfilm or microfiche digital conversion, you have many options for storing and accessing your digital files. Maybe you decide to keep them on a hard drive, on a shared network server, or in an electronic document management system. Depending on which you choose, you likely have a type of global text search to find your documents, but it’s probably rudimentary and not very fast. If you have your files on a hard drive and you search using the Windows folders, you’ll be waiting awhile for your computer to churn through the documents to find any data.
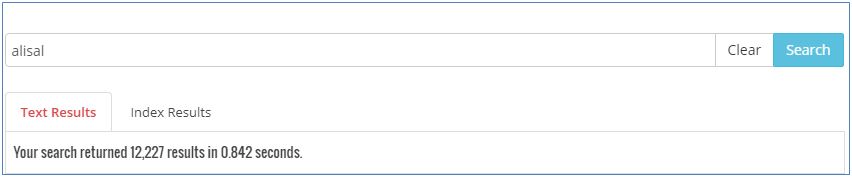
12,000+ results found in less than one second.
Digital ReeL gives you the ability to search millions of records in sub-second speed. Imagine the time you save by typing in a word or phrase and having results pop up almost instantaneously, cutting your research time by 3-10x!
We’ve seen this happen with our customer: a law enforcement client let us know that before using Digital ReeL they had the goal of completing 12 requests per day. After Digital ReeL, their daily goal was increased to 29 per day. That’s more than a 100% increase in productivity! Another client from a library used to spend 3-4 hours per week fulfilling patron requests by accessing the library’s hard copy microfilm; after converting her film using Digital ReeL, she now spends a few minutes per week taking care of the requests.
Hosted access through the internet, or “cloud” storage, is one of the most utilized methods of storing and accessing images and data. Hosting provides the ability for users to access information from (almost) any internet-connected device, acts as a disaster recovery backup of organization data, and just makes retrieving records a lot easier when organized correctly.
With a traditional digital conversion, hosting may or may not come into play. Converting your microfilm to digital images doesn’t automatically make them available in the cloud; to have web access, you need to somehow make them available through the internet by using an application to house the electronic records, organize them logically, and provide user accounts for use. Unless you have a third party application already in place, or are planning on implementing one, you’re not going to have a web-hosted platform to get to your digitized records.
When you convert your microfilm and use Digital ReeL, your records are hosted and available via a simple web portal, perfect for frequent record retrievals or even as a backup copy in case something happens to your original film records. Digital ReeL was created as an archival microfilm repository, so there aren’t hundreds of functions or bells and whistles; it’s made for simple and productive record retrieval and image optimization, so the costs of hosting can be much less than some of the more well-known web-storage options, and still be easy to use.
Traditional microfilm and microfiche scanning projects provide you with digital images and data. But what do you do then? What happens if you lose the digital files, or they get corrupted, or someone breaks the hard drive they were delivered on? At this point, let’s hope you made a backup.
When you choose Digital ReeL, you’re setting yourself up for success and peace of mind. Not only do you get to access your digital files within our easy-to-use application, but you’re also protecting yourself from data loss by having a synched co-located copy of your digital files at our secondary server, housed at the RagingWire Sacramento facility. Even if one of our servers goes down due to a natural disaster, a power outage, or any other number or reasons, your files are still accessible and protected at the other server site.
That’s better than a hard drive on a shelf, right?
When you decide to go forward with a traditional microfilm scanning project, you’ll end up with the images and data that you want: PDFs or TIFs named by specific indexing information, such as document name or microfiche title, for example. What you won’t get with this method is a digital replica of your original copy, meaning an exact virtual replica of your microfilm or microfiche records.
If you choose Digital ReeL for your conversion project, you’ll have an exact replica of your hard copy microfilm, giving you the ability to see the original archival record.
Why is having the original archival record important? Because you can always go back to it to see the historical context of the content. If you don’t do this, you may lose the context of your data forever.
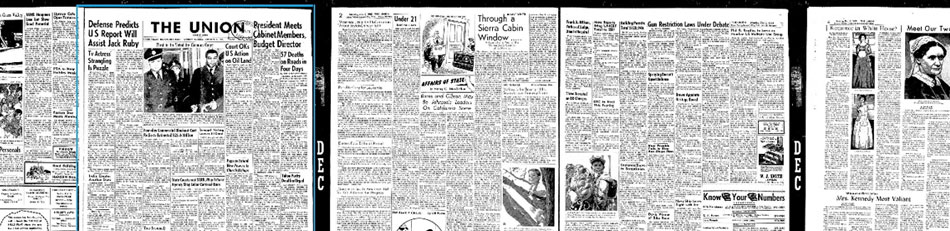
A digital replica of the original fiche sheet allows you to see the historical context of the images and data.
Image deliverables that are in grayscale format, such as a grayscale PDF or a JPG image, are just that, a grayscale image. Grayscale images normally have more tonality than a black and white image (like a TIF) and can provide more detail than that same black/white image.
When you receive your grayscale images via a traditional microfilm conversion project, that’s pretty much it: what you get is what you get. Yes, there are tools and suites out there that you can purchase to do some adjustments with these images, but for the vast majority of folks who are having their microfilm and microfiche digitized, they don’t have these tools. You’re expecting companies like BMI to provide the tools for you, or at least get you good looking images! The problem with microfilm is that many times the images are just not going to be great.
When you scan a roll of microfilm, the standard practice is to scan the entire roll at an “average” setting based on the density of that roll of film. What that means is that a film density check is taken at multiple points across the entire roll (rolls are 100’ or 215’ long), and then the average density is applied to provide a scan setting. If the original filming of the images was done poorly, or the light settings changed throughout the images on the roll, the average scan setting may not provide optimal images. With a traditional conversion where you receive PDFs, you’re kind of stuck unless you want to pay a lot of money for individual image optimization.
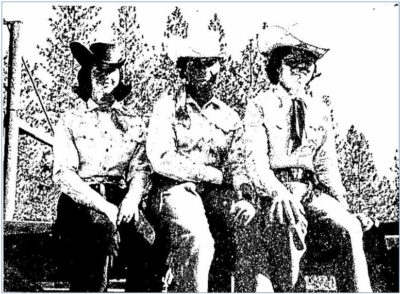
Original image before enhancement
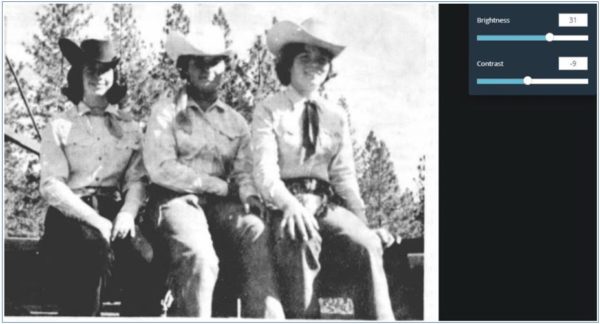
Optimized image in Digital ReeL after grayscale enhancement and adjustments.
One of the best parts about Digital ReeL is that you have the ability to adjust the image quality within the application. You don’t like the look of one of the images on your reel of microfilm or sheet of microfiche? Enhance it! Decrease the brightness, increase the contrast, despeckle the image, and so on. YOU get to decide the optimal legibility of the image without having to go through another round of scanning and paying for small tweaks.
Would you find it useful to have a digital replica of your original microfilm and microfiche records?
Receiving PDFs and TIFs of your film and fiche documents isn’t wrong by any means, but before sending those suckers off to storage (or even disposal) you better make sure that all the images have been captured and the data is correct! That’s one downside to traditional scanning projects: once the digital files are made, unless you go to look at the hard copy microfilm you’ll never know if what you’re seeing is how the original looked, how it was named, or the context of the document.
Once your microfilm is scanned, indexed, and loaded into Digital ReeL, you have everything you need at your fingertips. You can search by index values (think SSNs or Name, for instance) or by global text search (searching by words or phrases across all images in your collection). Once you find the record, you can take a look at the single image or images contained in the doc, then take a look at the other files that make up the context of the material by viewing either the microfilm roll or microfiche sheet.
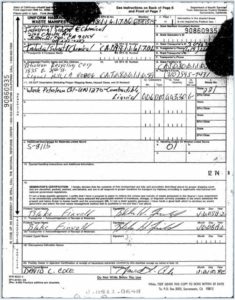
Single image that you may receive in a traditional conversion. Why are the spots there?
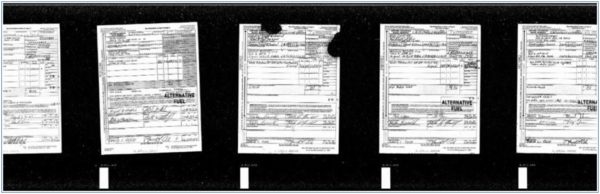
With Digital ReeL you can see the context of the original image.
Think of it like you’re telling a joke: if you just say the punchline, it doesn’t make sense. You need the whole setup and context to be understood, just like images and data on microfilm and microfiche.
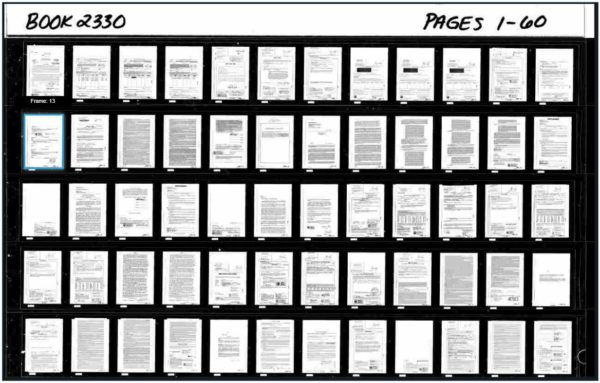
Lastly, if you don’t have a digital replica of the original microfilm roll or microfiche sheet, how do you know if you actually received all the images? Just something to think about…
A traditional microfilm digital conversion project may be the right fit for you, and we’d be glad to be a part of your project. And that’s the point we’re getting to now, is that we’d be a part of a multi-part project. With standard digital scanning you’ll very likely have to research, choose, and utilize numerous parts to make a single whole: a scanning company to scan your microfilm and microfiche into electronic format, a company to index the records or do it internally using your own staff, a third party application to store the images and data (if you don’t want to just keep them in a folder on your hard drive), and a backup recovery storage organization to house either the original hard copy film rolls and microfiche sheets or the digital files.
That process may be simpler than we’re describing here, but what we can say is that by choosing Digital ReeL for your digital scanning and conversion project you’ll have an all-in-one solution that will take you from start to finish with one company: BMI. There’s a lot to be said for simplicity.
Where Do Your Images Go After A Digital ReeL Conversion?
The images are in the Digital ReeL application, available for you to access as soon as they’re imported! This is a major benefit during a scanning project; many projects take weeks, even months to complete, and being unable to access your records for that entire time can be worrisome. When you use Digital ReeL, as soon as the microfilm and microfiche have completed the steps in your custom process flow you’re able to view them within the platform, with all functions available to you.
Do you have to only use Digital ReeL? Absolutely not. Many times we provide our product as a backup to our customers while they prepare their traditional images (PDFs, JPGs, etc.) for import into their own system. While they’re doing their thing, our customers often use Digital ReeL as an interim tool so that they can have access to the information they need without having to rush their internal project.
Where Do Your Images Go After A Traditional Conversion?
Do You Know Which One Is Right For You?
Of course we’d love if you chose Digital ReeL as your solution, but it may not be the right fit for your particular needs. There really isn’t a wrong answer here, as long as the end result makes sense for you.
If you’re not sure how to approach your project and would like some guidance, get in touch with us and we’ll connect you with one of our teammates to see if we can help.
Further Reading
Having more information available to you doesn’t hurt, so here are some suggestions that go hand-in-hand with the topic of microfilm conversion.
“How Much Does Microfilm Scanning Cost?” shows you the various aspects that come into play when pricing your scanning project. If you’re wondering about how much your project could cost, here’s a great place to start.
“How Does A Microfilm Project Work?” gives you the general steps involved to execute a microfilm scanning project with BMI. There’s an infographic on the page for folks who like visuals better than text.
“Walk Backward To Sprint Forward: Reverse Engineer Your Project” will give you a sense of time management for your project. Is there something driving your need for film scanning? Do you have a deadline to meet? Start there and work backward to figure out what you need to do and by when.
“Microfilm Deterioration: How To Identify It And How To Preserve Your Content” is a bit of a warning for any film owners out there. In case you’re not planning on scanning your microfilm soon, at least make sure it’s not falling apart so that you don’t lose your data forever!