What goes into a paper scanning project? Quite a few things, it turns out. A common misconception is that paper scanning (or document scanning, file scanning, record scanning, etc.) is easy and cheap. This can be true, but the reality is that paper scanning oftentimes is complex, time-consuming, and fairly pricey.
The irony is that these projects are referred to as “paper scanning” projects, but they should be called “prep” and “index” projects instead. As you’ll see as we go through the steps below, the actual scanning and imaging part of the project is usually the easiest; the hard part is getting your files prepared for scanning and then organizing them into digital files!

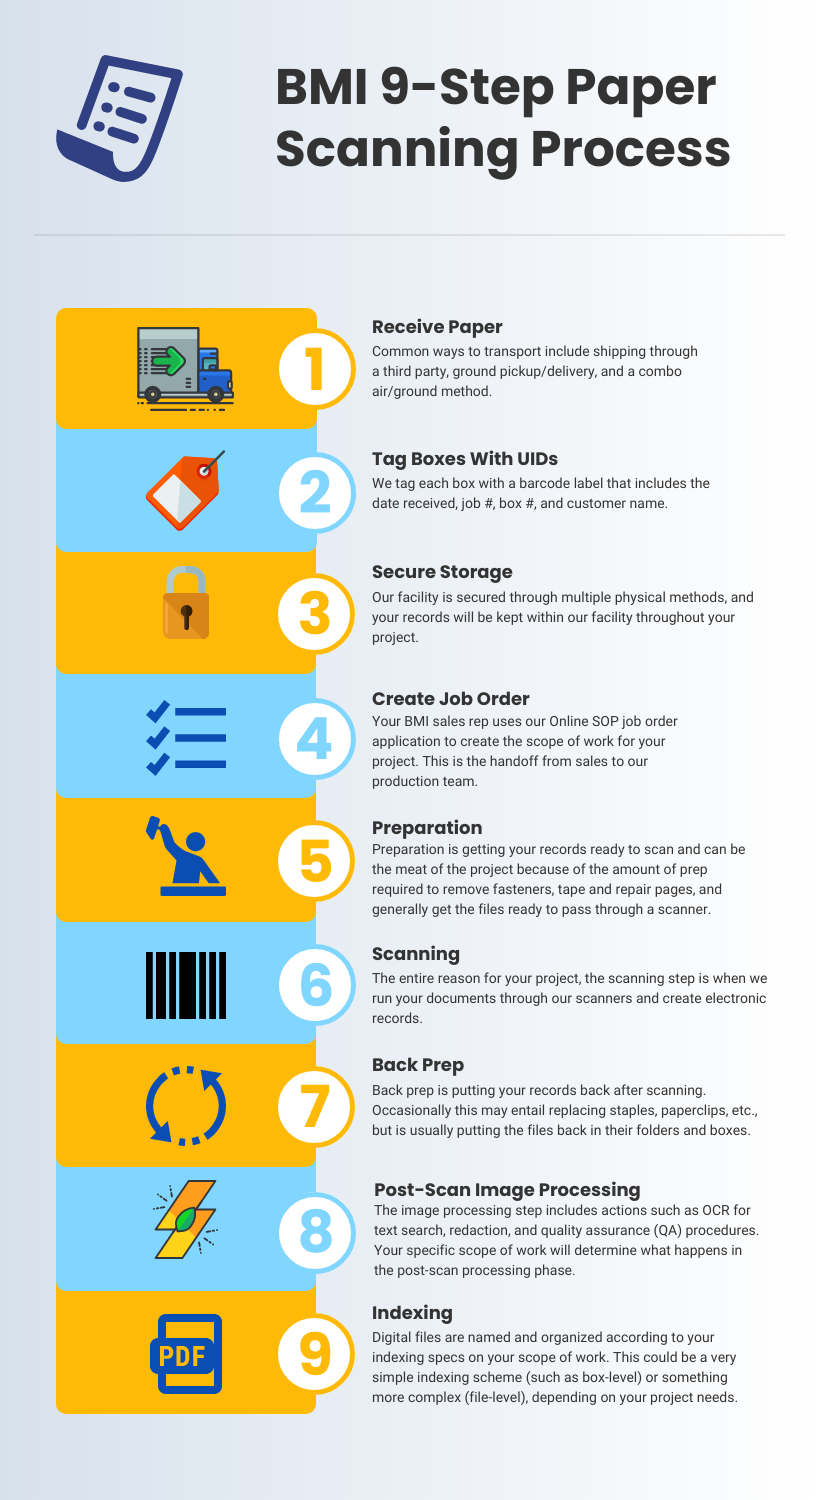
Receive Paper
When we receive your paper records, that’s the real kickoff for the project. No doubt there’ll be things happening before this such as sales calls, price negotiations, creating the scope of work, and contracting, but the real “process” begins when we have your records in hand.
The way we get your physical documents varies and will depend on the size of your project, the types of records you have (boxes of files, engineering drawings, oversize books, for example), and the location of the records. In our “Microfilm Transportation” article we describe three common methods of transportation for microfilm records, but these can also be applied to paper files.
First is shipping through the mail or using a service like FedEx – this is best for projects that aren’t too large, maybe under 50 boxes or so (about a shipping pallet of material). Next is ground transportation, usually meaning that we’ll send one of our drivers to your location to pick up the records – this is most often used for regional projects. We’re based in Northern California, so a project in California or the general western region would likely fall into a ground pickup. Last is an air/ground combo – this is when we send an employee to your location and they rent a vehicle to bring your material back to us. This is for long-distance and large projects.
Tag Boxes With UIDs
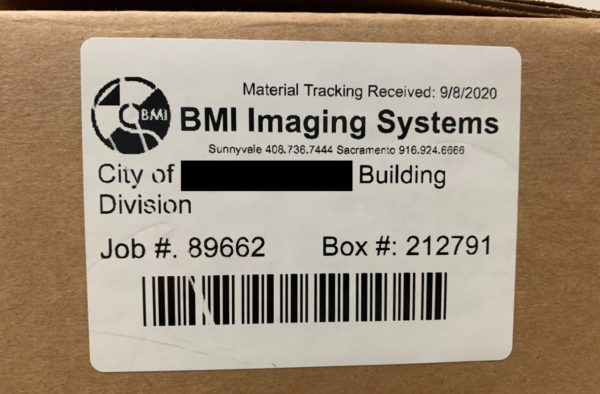
Once your records get to our facility, we tag them with barcoded unique identity numbers (UID) for internal tracking.
By tagging your boxes we can verify how many boxes of material we’ve received and keep track of each unit throughout the entire project. The tags will contain the customer name, box number, and project number.

Secure Storage
Within our facility we have multiple levels of security – first is the outer layer, which prevents unauthorized people from just walking into our offices. Then the “lobby” is separated from the production area with keycard scanners. Within the production area there are various rooms that are accessed with keycards, and two more secure storage areas.
Most records are stored in the general production area because they are standard files that don’t require additional segmentation. If you have material that requires a higher level of security, such as criminal files or HIPAA records, it will be stored in one of our designated rooms.
Create Job Order
Creating your job order is our internal “handoff” from sales to production. When the project is received and we’re ready to work on it, your sales rep creates a job order in our internal Unity system.
This project description details your information for billing and shipping, the security level of your project, the primary contacts for project questions and approvals, and the step-by-step processes to complete your job based on what we agreed to.
For example, you might have requested 300dpi grayscale scanning of your engineering drawings. Related to this will be preparation specifics (flattening your folded records and fixing tears), indexing requirements to name your digital files, final output format (PDF, TIF, etc.), and maybe some other items like importing your files into an electronic records management application.
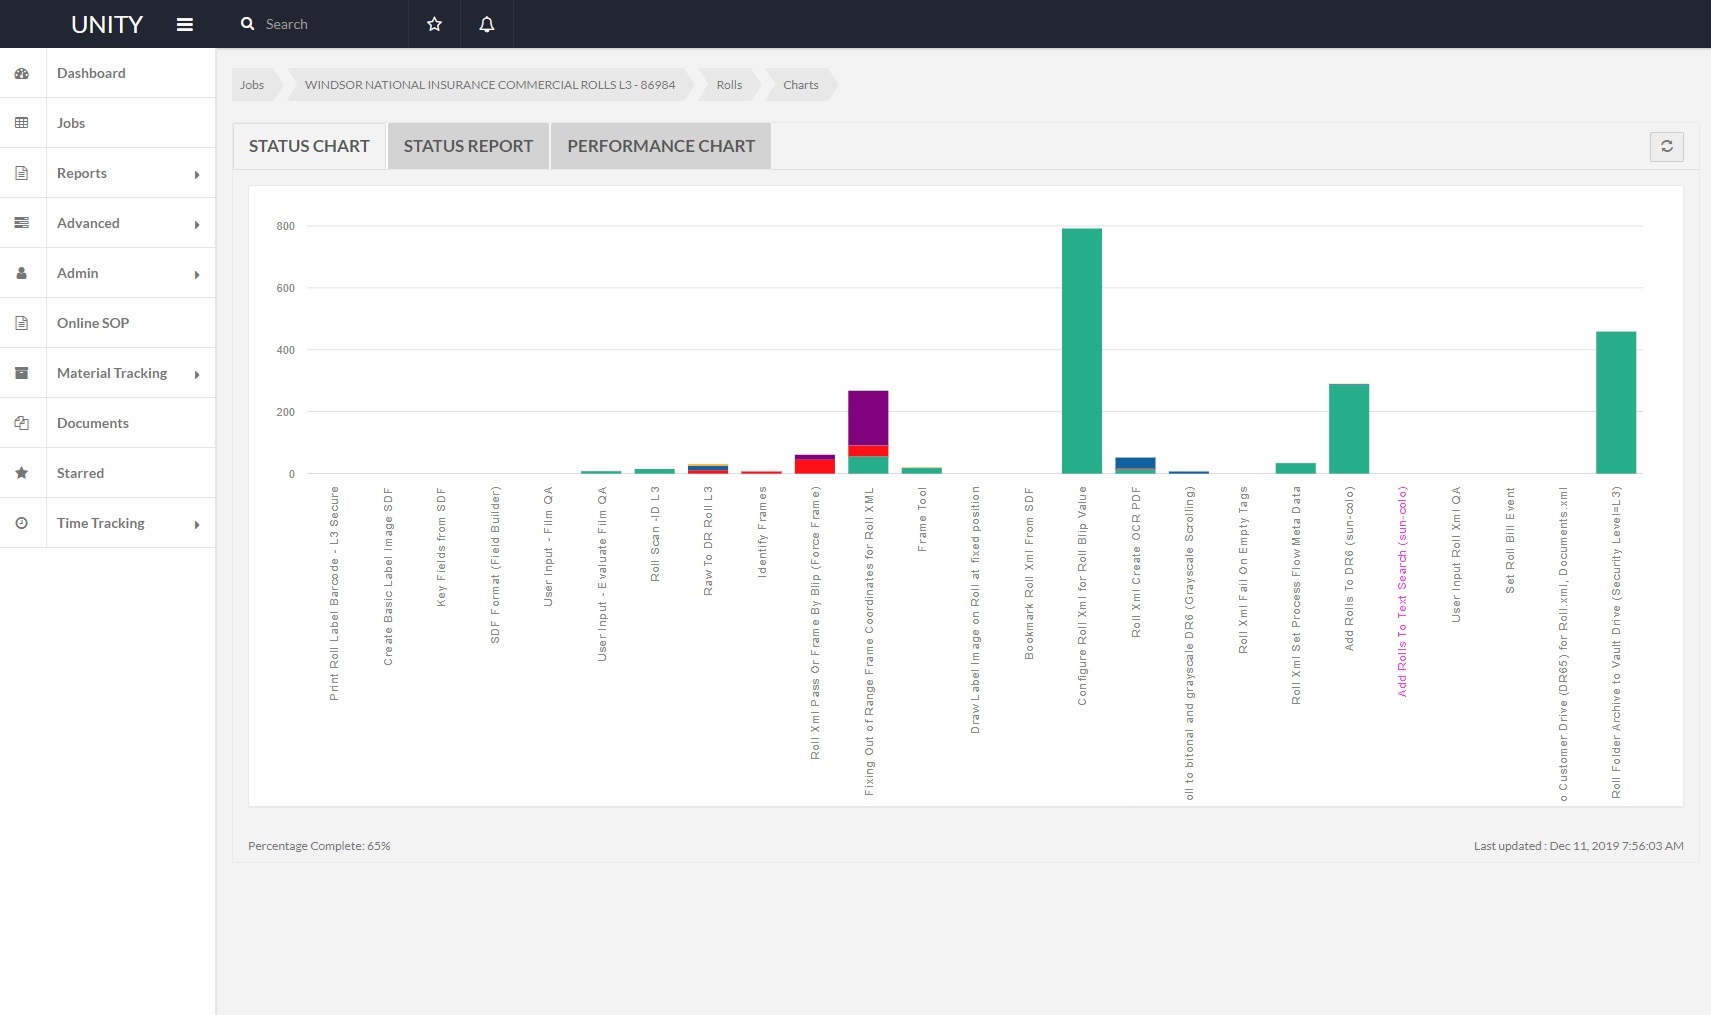
Below is an image of a scanning project with all the steps charted out: yours might be this complex, with 25 steps, or something simpler with just 10 steps.

Preparation
Paper preparation is what we do before actually scanning your records. We go through all of your records and do what we have to so that the files can be loaded into our scanners and digitized, and this can include removing fasteners such as paper clips and staples, removing pages from folders and binders, flattening drawings that were folded, fixing tears and rips, and anything else required to allow us to scan the documents.
Preparation, or “prep,” is a critical but often misunderstood and underestimated part of the overall paper scanning process. Most people think that scanning is easy and it should be dirt cheap – and it can be if you have super clean records with little to no prep required!
Most of the time paper records need prep before being scanned, and this is usually one of the more costly items due to the effort required.
Think of it this way – if you gave us a box of printer paper (nice, clean reams of pages without any folders, staples, tears, anything!) then scanning is a breeze. We’d just load that sucker up and blast through our scanner! Now think about your actual records – documents paper clipped and stapled together, tears, sticky notes, photographs taped to pages, six-part folders with multiple files in each section, and so on. We can’t just load this up and scan it – it needs to be prepped!
Scanning
After prep, your boxes and files can be scanned. Depending on the specifics of the project and your material, your records might be all prepped prior to scanning or done throughout the project. Sometimes it’s easier for our people to scan all of your records in large batches, and sometimes it’s easier to scan in smaller chunks, so we’ll set up our project steps to optimize our productivity.
Scanning includes the specifics related to how you want your digital files received, such as the resolution (300 dpi is the norm) and the image format (bi-tonal, grayscale, or color images).
Back-Prep
Usually not as difficult as the initial preparation step, back-prep is replacing your records after scanning. The simplest back-prep is when we just have to put the files back without having to re-fasten them; for instance, if you have a bunch of foldered files, we’re only required to put the pages back in their original folder and then in the box, but not re-staple or re-bind anything.
Back-prep gets costly if you want everything replaced exactly as we received it. Yes, some customers want all of their files re-stapled, re-bound, etc. Expensive!!
Post-Scan Image Processing
Once scanned, your digital documents need to be processed. This includes rotating images so they’re right-reading, running them through OCR (optical character recognition) engines so you can use text search on your files, redacting data from specific images so that sensitive and confidential information is properly secured, or sending the records through our quality assurance (QA) process to ensure that your data was captured correctly and we followed the guidelines of your project requirements.
Most of the post-scan image processing is done using computers and automation, but it still requires oversight from our project managers so that issues (“exceptions”) that are flagged get resolved and so that your project keeps chugging along towards completion.
Indexing
Indexing is the way in which your digital files will be named and organized. You might want to import your digital files into a document management system, or you may just keep them on a USB hard drive or network share drive; whichever is the case, the records need to be named and organized so you’re able to find them when you need them.
Indexing at the box level or folder level will keep your costs down in most cases because it’s simple and straightforward. If you decide to get a little fancy and index at the “section” level (maybe you have multi-part folders) or at the page/file level, your costs will go up.
The more detailed the indexing, the more you’ll pay. You need to balance the tradeoffs of paying more now for “better” indexing, or paying a little less and replicating the physical layout of your records. You can take a look at our post about indexing to dive more into the topic.
Next Steps
Reach out to us today! Click the “Get Your Quote” button below, fill out the form, and we’ll quickly reply to you to discuss your project.
Further Reading
The three articles below dive deeper into paper scanning and digitization. Take a look at them to learn more and better prepare yourself for your digital scanning project.
“How Much Does It Cost To Scan A Box Of Paper?” is a great sibling article that covers the 7 factors that affect your paper scanning price. Take a look to get an idea of what you may spend to digitize your records.
“Breaking Down The Box” lays out how to approach your document scanning project by using a “big to small” approach.
“The Price Of Digitization” details how to view your project costs – don’t be fooled by a “low” price that turns into an expensive quagmire!

