
You open an old storage box expecting paper files, but instead you’re staring at reels of microfilm. If you’ve never dealt with it before, the questions start piling up fast: What exactly is this? How do you scan it? And how much will it cost? Whether you’ve inherited a few rolls from a small office archive or discovered thousands in a warehouse, understanding what you have and how to digitize it is the first step to making sure your records are preserved and accessible for years to come.
What Is Microfilm and Why Digitize It?
Microfilm is a record format that stores miniaturized photographic reproductions of images on film. It’s created by photographing original materials-such as books, office documents, engineering drawings, or oversized records-and shrinking them in size to fit onto the film.

While microfilm was once the gold standard for long-term storage, the reality today is that it’s cumbersome to search, prone to deterioration over time, and requires specialized equipment to view. Digitizing your microfilm unlocks instant access, makes searching simple, and protects the content from the risks of physical decay.
Microfilm Types That Affect Digitization
When you start a scanning project, one of the first things a digitization company will ask is, “What type of microfilm do you have?” This matters because different formats require different scanning approaches, which can affect cost, timing, and output. The two most common widths are 16mm and 35mm, and for the 16mm variety, the length can be either 100 feet or 215 feet. You may have simplex film (one image per frame) or duplex film (two images per frame), and rolls can be either open-reel or in cartridges.

The way images are oriented on the film also matters. In comic mode, images are right-reading horizontally, while cine mode places them vertically from top to bottom. Reduction ratio-how much the original image has been shrunk-is another key factor, with 24x being most common, though 42x is also used to fit more images on a roll. Some rolls include blips, which are small marks under images that help with indexing and retrieval, and others might use duo or serpentine sequencing, where image order wraps around the roll. Understanding these nuances helps ensure your scanning project is set up correctly from the start.
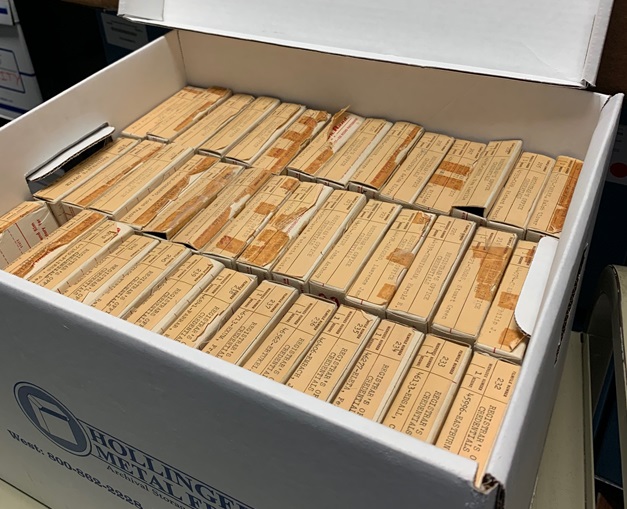
Estimating How Much Microfilm You Have
If you have just a few rolls, counting them is easy. But when you’re dealing with hundreds or thousands, a quick estimate can save time and give you a baseline for project planning. For example, a full bankers box typically holds about 90 rolls of 16mm film or about 50 rolls of 35mm film. Multiply the number of boxes you have by those averages, and you’ll have a ballpark total to share with your scanning partner. Knowing your quantity upfront not only helps with budgeting but also speeds up the quoting process.

Costs of Microfilm Digitization
Pricing for microfilm scanning depends on several factors, but a general range for 100-foot simplex rolls is about $20 to $40 per roll. Duplex rolls, 215-foot lengths, or complex formats like duo/serpentine can be more expensive because they require additional handling and processing. Larger quantities typically lower the per-roll cost, while small collections fall toward the higher end of the range.

Another major cost factor is indexing and how the digital images are organized after scanning. Simple roll-level indexing mirrors what’s written on the box or label, while more detailed image-level indexing requires additional labor and will increase project costs. These numbers are just a starting point. The specifics of your collection-its condition, format, and required indexing-will ultimately determine the price.
The Microfilm Scanning Process
Once a project is contracted, most digitization companies follow a structured workflow to ensure quality and consistency. At BMI Imaging, for example, we start with a Milestone 1 proof of concept, a small-scale test batch designed to refine your project’s process flow before full production. This stage lets us test equipment settings, confirm output formats, and ensure your requirements are met.

From there, the film undergoes preparation, which can include repairing damage, splicing sections, and checking density levels at the start, middle, and end of each roll to calibrate scanner settings. The scanning phase itself converts each frame into a high-quality digital image, followed by post-scan image processing to correct orientation, apply OCR text recognition, and organize files according to your indexing requirements. Quality assurance checks are built in throughout to ensure accuracy and clarity.
How You’ll Access Your Digitized Microfilm
Once your microfilm is digitized, you’ll need a way to view and use it. One option is to receive the files in standard formats such as PDF, TIFF, or JPEG, delivered on an encrypted USB drive or through secure electronic transfer. If you already have a document management system, you can import the files directly.

Another option is to use a hosted solution like our Digital ReeL application, which offers secure, browser-based access to your records. With Digital ReeL, you can search across your entire collection, apply image enhancement tools, and view rolls as they’re being scanned-sometimes before the project is even finished. Many clients use it as their primary access system, while others treat it as a disaster recovery backup in case their primary storage is compromised.
In Closing: Work With Experts to Scan Your Microfilm

Microfilm can be tricky to handle and even trickier to scan correctly. The best way to ensure your records are digitized accurately, securely, and in a way that meets your needs is to work with an experienced scanning partner. Do your research, compare options, and choose a team with proven expertise in microfilm formats, indexing, and secure handling. We’ve helped organizations of all sizes transform their microfilm collections into secure, searchable digital archives, so if you’ve uncovered a box of microfilm—or an entire warehouse full—we can guide you through every step of the digitization process.
Next Steps
Reach out to us today! Click the “Get Your Quote” button below, fill out the form, and we’ll quickly reply to you to discuss your project.
Further Reading
Microfilm Digitization Hacks: 4 Ways To Streamline Your Project
Use these tips and hacks to create a simpler, more efficient, and smoother microfilm digitization project for you and your scanning partner.
Overcoming 5 Common Fears In Microfilm Digitization
We’ll cover five common fears of microfilm digitization and discuss why you don’t need to be afraid! And also what you can do to move forward and make your project successful.
The Advantages & Disadvantages Of Microfilm
Microfilm has both its advantages and disadvantages. We’ll cover those here and give you an idea of how you can enhance your microfilm records through digitization.