
This article is for County Clerks, Assessors, Recorders, and Registers of Deeds.
(okay, if you’re in the land title business in general, it’s for you, too)
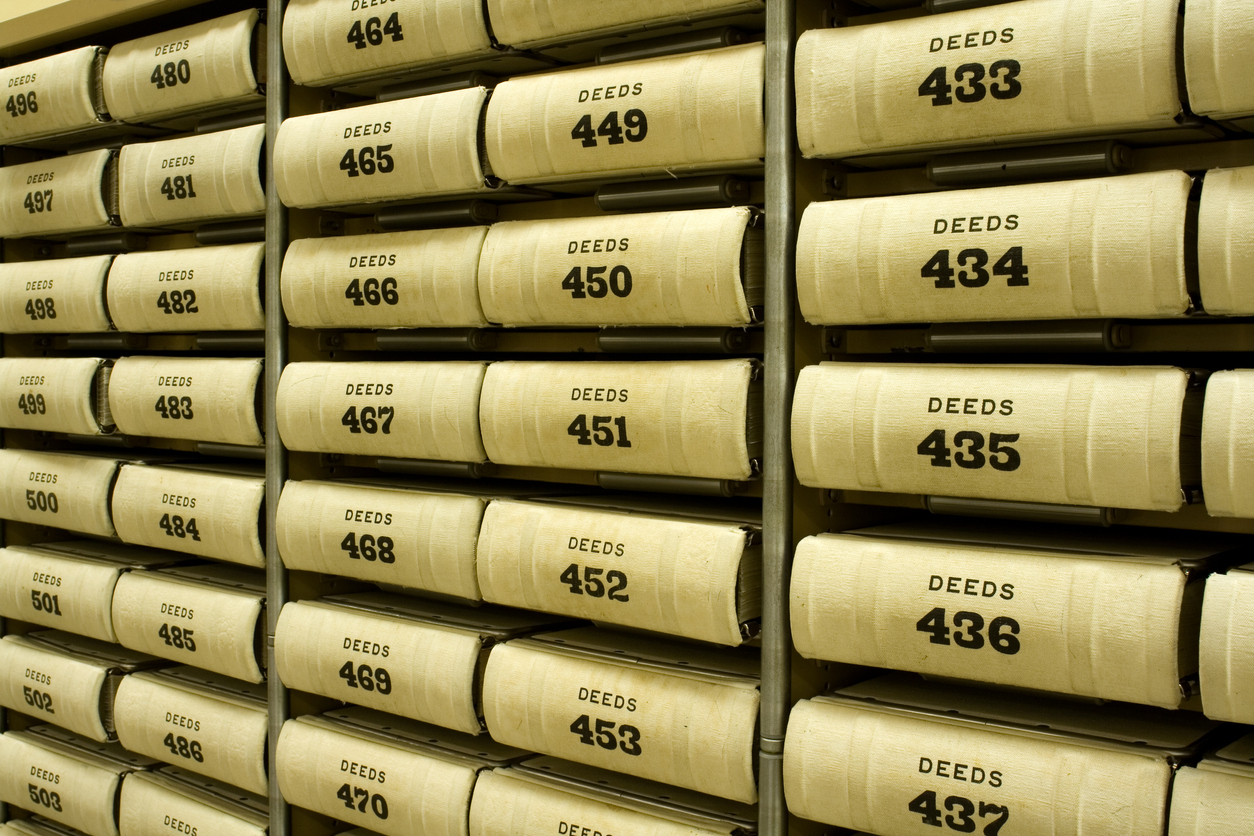
As a Clerk-Recorder, have you found yourself going to the records storage area (aka “basement” or “cave”) to retrieve an enormous, oversized book so that you can thumb through it for awhile and create a copy to fulfill a customer’s request? Or have you pulled out a roll of microfilm and loaded it onto your ancient reader/printer, subjecting yourself to minutes or even hours of scrolling through the old reel, just to realize you have the wrong microfilm or your reader-printer isn’t working?!
Even without experiencing the episodes above, you may have thought about scanning and converting your historic land records for preservation purposes. And why wouldn’t you? It not only gives you the benefit of rapidly accessing your records, but also provides you with a backup of your physical material. Those two reasons alone are worth your time to explore digital scanning and historic preservation of your land records.
What Types Of Records Should Be Digitally Preserved?
As a scanning and document management company, we like to think that all of your records should be digitally preserved (only half joking here), but we know that this is usually outside of the realm of possibility.
Some particular records that you’ll want to consider for digital preservation:
- Maps (Parcel, Survey, Subdivision, Assessment)
- Documents (Deeds, Official Records, Miscellaneous Records, Vital Records)
- Indexes (Indexes to Patents, Deeds, Grantor-Grantees, Vital Records)
Even though the following aren’t land records, as a recorder or clerk you may have some of these types of collections in your care, too:
- Historic Newspapers
- Court Records Census Records
All of the above records can and should be digitally captured to preserve your historic data. The Property Records Industry Association (PRIA) has created a document that describes the history of the types of material used for records preservation. Take a look at the doc to learn a bit more about the background of the material types referenced throughout our article.
The Benefits Of Digital Preservation
Some of the below is covered in our article about the advantages of digitization, but we’ll recap them here and provide a few more for you to ponder.
- rapid access to staff, researchers, and customers
- storage space cleared up for other uses (and just being able to not have to deal with hard copy material anymore!)
- adjustable image enhancement (we’ll describe this in more detail later on in the article when we discuss Digital ReeL)
- backup disaster recovery
- it’s always good to have a backup. As they say in the Marines (we have some veterans working at BMI), “two is one, one is none.” It’s not if something will go wrong, but when.
- multiple users accessing records simultaneously
- no more hardware reader/printers and maintenance costs
The Drawbacks Of Not Digitizing
You’ve seen the benefits of digitizing, now let’s double down and touch on some drawbacks to not digitizing:
- disasters, natural or otherwise
- life happens, and it’s good to have a backup copy of your records in case of natural disasters or other mishaps
- even mini-disasters, such as someone losing a roll of film or tearing pages out of a book can cause unnecessary pain for your organization
- FamilySearch has a nice article about preserving your records: “Preserving Historical Records: Lessons of the National Personnel Records Center Fire”
- microfilm deterioration and decay, leading to loss of images and data
- continuing to spend time handling physical records and the amount of effort this requires
Once Scanned, How Will We Provide Access To The Digital Records?
Scanning is great, but if you can’t access your digital files easily then what’s the point? There are many options available, but we’ll simplify it and give you the two main solutions that we normally provide: importing into your current digital system or using our Digital ReeL application.
If you have an existing document management system, it makes sense that you’d want to import your files there. With some basic information we’ll be able to scan and convert your records and prep them for population into your database. This’ll require a load file of your current application and some general indexing information, but it’s generally pretty straightforward.
Your other option is our Digital ReeL application. If you don’t have a tool already in use to access your images (this would be surprising!), then Digital ReeL could be your main access point. Even if you’re already using a management application, you should consider Digital ReeL as a backup and optimization tool for hard-to-read or illegible images (more on this further down the article).
How Do We Ensure The Integrity Of Our Electronic Land Register?
One way that we suggest is to capture the entirety of your material as it exists in physical form, where possible.
For example, if you have bound books, capture the entire book as it exists using an overhead scanner and include the numbered pages even if no data appears on the page. If you have records on film, capture the entire roll and photograph the roll container so that you know how your office labeled it in case you need to reference the original naming. If your documents are on microfiche or aperture cards, capture the entire sheet/card, including the title strip, so that the context of the images are always available.
Cropped images from the above material types can be provided if you want to put them into your existing electronic system. But don’t forget that once you crop images and remove them from their original context (such as a strip of microfilm), the possibility exists for incorrectly merged or missing images.

Vital records: death, marriage, and birth certificates
How To Go From Hard Copy To Digital
Let’s imagine a common scenario we see that you might be familiar with: you’ve recently been elected to office and are tasked with preserving your historical land records in a permanently legible electronic state. You’ve also likely inherited a recording system which already contains digital images and indices dating back to about 2005 or so; the remainder of the records and index documents are probably contained on a variety of media types which may include books, microfilm, microfiche, or aperture cards.
Taking into account the scenario described above, the idea of tackling a conversion project like this can be seem overwhelming! Boiled down, you’re tasked with digitally preserving your hard copy records (a project in itself) while somehow integrating the electronic images and data with an existing application that has records dating back almost 20 years (another project in itself). That’s a tough nut to crack!
To keep you sane and help you get to the finish line, we’ll lay out the main steps you need to go through to make your project successful. They are:
Step 1: Create An Inventory Of Your Records
Step 2: Decide The Final Destination Of Your Images And Data
Step 3: Determine Your Indexing Methodology
")
Step 1: Create An Inventory Of Your Records
Creating an inventory is useful to you because it’ll give you a birds-eye view of your project and let you absorb it holistically. If you don’t get an overall inventory, you may get so focused on one piece of the project (such as the already-digital images being transferred to a new application) that you may disregard another piece that is actually more critical, time-sensitive, or costly (such as getting your books scanned because you have to move your office in three months).
Creating an inventory is useful to us (let’s assume you decided to work with BMI … thanks for choosing us!) because before we get nitty gritty on the details and prices, we can get a feel for the project as a whole to determine estimated project price, resources required, and a turnaround schedule. It’s key to get on the same page with whoever you choose to work with, otherwise you’ll run into roadblocks later that will cause your project to grind to a halt for even small reasons.
Your inventory doesn’t have to be perfect, but it should be pretty close to what the project will actually look like.
To create your inventory, start by sorting your archival collections into media types, such as:
- Maps and drawings
- Oversized documents (bound or unbound books like grantor/grantee records and deed books)
- Microfiche (16 or 35mm jacket fiche, COM fiche, step-and-repeat fiche)
- Microfilm (16mm or 35mm, blips or no blips)
- Aperture cards (single or multiple images per card)
- Digital (USB, DVD)
- Any other types of material
Once you’ve determined the different media types, you should then sort your records by document type:
- Documents (Deeds and Offical Records)
- Indices (Grantor/grantee)
- Maps and Plats
- Newspapers
- Personnel files
- Miscellaneous
Important to note here is that each media type can have multiple document types, and vice versa. For example, you may have microfilm (media type) that contains both grantor/grantee records and plats (both are document types). Conversely, you may have deeds (document type) that reside in oversized bound books as well as microfiche (media types). We’re not trying to make this too confusing, but just giving you a heads up of what you may run into!
Once you’ve sorted your media types and document types, it’s time to get an estimated volume. The majority of this task is relatively simple by counting the number of books you have, the number of boxes of paper, or the number or rolls of microfilm. However, estimating the number of microfiche sheets and aperture cards can be a bit trickier, so we actually wrote an article to describe how to do it! The gist of the idea is to measure an inch of fiche or cards, count how many sheets/cards are in that inch, and then use that to extrapolate your collection. There are ~100 / inch, so if you have 50 inches of microfiche, you’re looking at around 5,000 fiche total (very general estimate).
If you’d like to read the full article, or learn another way to estimate your collection, you can check it out here: How Much Microfilm And Microfiche Do I Have?
Step 2: Decide The Final Destination Of Your Images And Data
First, ask yourself the following question: “once my hard copy historical documents are digitally converted, is my existing recording system the best place to manage and access the records?”
If your answer is “yes,” then that’s great and you’re already ahead of the game! Many folks aren’t thinking about microfilm, microfiche, and 100-year old, oversized, handwritten books when they imagine implementing their awesome new enterprise document management and cashiering system. Unfortunately, contemporary systems require extensive indexing (costly) in order to take in the old documents. It probably won’t surprise you that the indexing criteria itself has changed over the years and the old document identification criteria has changed completely; converting old records to new systems can pose compatibility and interpretation issues. Keeping the old media (books, film, fiche) in a digital state similar to its original condition has built-in safety factors.
The majority of recording systems are designed to digest recently submitted real estate transactions created on highly legible white paper (usually a 300dpi bi-tonal image). This probably won’t be the case with the historical records we’ve been writing about in this article!!
Poor quality images on a roll of microfilm.
With the considerations mentioned above, you can make an assessment of the document management system you’re using (or looking to obtain) and understand its limits before embarking on the digital preservation journey. If you’re not sure what you should be looking for, we’ve put together a comparison of two solutions: a “traditional” conversion solution, and our own Digital ReeL application. Yes, the comparison specifically mentions microfilm; even knowing that, you can understand by now that many of the media types we’ve discussed can be finicky and may need a platform that’s meant to handle archival records. We’ll come back to Digital ReeL later, so if you don’t check out the comparison now, that’s A-okay.
To bring this back around, the point of Step 2 is to ensure that you understand what your system can handle and how it handles images and data, and also to think about how you want to use the data once it’s digitized. Don’t think that just because something is in digital format it’s automatically easier to use – you need to make it happen!
If you don’t have a document management system in place yet, that’s perfectly fine. The steps we’re outlining still apply if you’re currently in the process of purchasing a system, or if you’re just creating digital images to keep as a backup on a hard drive, network server, or any other location.
Step 3: Determine Your Indexing Methodology
Now that you’ve created an inventory of your records and decided the location they’ll go to and be accessed from, it’s time to determine your indexing methodology: the way that your digital files will be named and organized.
If you’re thinking about importing historical images into an existing recording or electronic document management system, the digital files need to be assembled and indexed. This can be a difficult task when you consider that a typical roll of microfilm may contain 2,500 frames, and organized more or less by roll-level.
A strip of official record images on microfilm.
When your folks are scanning your daily documents, it’s easy to identify where one begins and where it ends, as well as capture the required index fields. But if someone else is doing this for you, and the material isn’t a few documents a day but instead is old media and thousands of records, what then? Look again at the image of microfilm above (to use one media type): if you’re not the owner/user of the content on that roll of film, how easy do you think it is for someone else to look through the images, identify which one signifies a new document, and then accurately capture the index information? Absolutely doable, but not necessarily easy!
Let’s imagine your goal is to scan official records from oversized books, microfilm, and microfiche and import them to your current document management recording system. This would be what we’d call a “traditional conversion.”
- First, the materials are scanned into an electronic format.
- Next, the images are cropped and assembled.
- “Cropped” in this sense means that the images are captured by the camera and then any excess information on the image, such as any extraneous border around the actual page/frame of the content, is removed.
- “Assembled” means that any images that are supposed to be together, such as a 10-page document, are digitally merged so that a single digital file contains all images from the document.
- Next, the digital documents are indexed based on the specifications you need, such as by a document number, book and page, grantor/grantee, or legal description.
- This task can be time consuming and expensive and comes with considerable risk for errors, as these indexing decisions are made by human beings.
- How can you be certain that this task was done correctly? The only method is to compare it to the original material.
- Finally, your documents are formatted for import into your recording system.
- This is done by matching a sample load file that replicates the format that your system requires to ingest digital images and data. Once you give the load file to your scanning and conversion partner, they should be able to format your files so that when you receive the files they automatically import into your system and populate all relevant fields with the captured index data.
- Curiously, many customers we’ve worked with didn’t know how their files were supposed to be formatted, so we helped them out and found the answer for them. But this can cause delays and confusion, so be prepared!
The level of indexing difficulty will influence price, so it’s not something to gloss over. As they say, “don’t make the perfect the enemy of the good.” Don’t just think of what level of indexing you want, but rather what level of indexing you need. Once you figure that out, you can see if the juice is worth the squeeze and decide if a simpler indexing methodology works well enough and fits within your budget, as compared to the “perfect” (but expensive) solution.
If you’re interested in learning more about indexing, take a look at our article “The Wild And Wacky World Of Indexing” for a bit more on the topic.
I’ve Gone Through Your Pre-Project Steps. Now What?!
By now you may be thinking that we’re done, but we’re not. Most of our customers didn’t have us pegged when they started looking around for someone to do their digital conversion project, but they ended up choosing us and one of our solutions anyways. Was it because we can complete a traditional conversion project just like a bunch of other companies? No.
It’s because of our alternate conversion solution: Digital ReeL.
We have an entire page describing the differences between a traditional conversion and Digital ReeL, so we’re not going to rehash all of those (you can find the page here). Instead, we’ll just lay out a few key points to whet your digital appetite.
Conversion Accuracy
When your microfilm records are scanned for Digital ReeL you’ll see an electronic replica of the material, a genuine digital copy. Each microfilm roll, microfiche sheet, and each aperture card will be replicated as it existed in physical form.
For example, a roll of microfilm will appear as a continuous stream of images in the exact order found on the hard copy film! The conversion process maintains absolute roll integrity: every frame, every splice and every inch of the microfilm is captured and displayed.
Digital ReeL is a technology that utilizes the entire unit of microfilm and microfiche, including all targets, flashers, splices and any other anomalies on the roll into a continuous image format. This ensures absolute fidelity to the original roll of film.
Image Quality and Optimization
When you choose Digital ReeL your images are presented as bi-tonal scans with the grayscale version of the image stored in the background, available as needed. We show you the bi-tonal image first for speed of access and loading the image, but let you choose to see the grayscale version if you want a more tonal image, or if you want to optimize it to your liking.
Using our adjustable grayscale enhancement feature, you’re able to adjust the brightness and contrast of the image. It’s almost guaranteed that some of your documents that are converted from historical microfilm or books will have legibility issues. But with our image enhancement capability, you can let out a sigh of relief that you’ll be able to optimize your images and not worry about illegible documents!
OCR Processing and Global Text Search
Your converted images will be sent through OCR processing engines to provide you with a global text search database, allowing you to search millions of images in sub-second speed! This search functionality will bring content level searching to these electronic records never available in the past. While your staff may not need the text search feature, the public often finds it very useful. Happy customer, happy office!
Are you wondering how Digital ReeL could make sense for your organization’s historical collections?
Watch the whiteboard video below to learn why Tom and his records management team chose Digital ReeL for their conversion solution!
Wait! What If I Want To Create Microfilm Of My Land Records?
So far we’ve gone over how to get from hard copy to digital, but here we’ll touch on the reverse. For some agencies, having an eye-readable hard copy version of historical their records isn’t just a nice-to-have, but is actually a requirement as mandated by statute or regulation. Regardless of which camp you fall into, if you’re wondering about archiving your documents on microfilm, we’ve got you covered.
Option 1 – Microfilming
This is the old fashioned way to create film: using an overhead camera, take a picture of your hard copy material then process the images onto rolls of microfilm. We can and still do this for various organizations that like to have microfilm (think about your local library or historical society).
Option 2 – Archive Writing
This is a fancier way of creating microfilm, but it actually starts with having digital images. If you already have your records in digital format, the images are used to create microfilm on “archive writing” machines. You end up with the same thing (microfilm), but it’s an additional generation away (original hard copy is 1st gen, digital images are 2nd gen, and the archive writing film is 3rd gen) from the original, so it’s quality may not be as great as going directly from hard copy to film.
Option 3 – Microfilm Digital Archive
The creme de la creme (in our minds), Microfilm Digital Archive (“MDA”) is an application we developed that allows you to actually create microfilm on a go-forward basis using a simple online tool. Forget about the FTP sites, DVDs, and other hassles; with MDA we provide a holistic solution that even let’s you know when you’re missing documents! Take a look at our page dedicated to MDA to learn more.
Next Steps
Reach out to us today! Click the “Get Your Quote” button below, fill out the form, and we’ll quickly reply to you to discuss your project.
Further Reading
Below are some related articles that you’ll find helpful as you learn more about digital preservation:
“Why Should I Hire A Scanning ‘Expert?’” reviews the logistics of a digital scanning project so that you have the knowledge to make a decision to either scan your material internally or work with a company (like us) to handle your conversion.
“Document Scanning & Redaction” is a guide to digital record redaction, or removing sensitive data. Your state may require certain documents to be redacted, so knowing a little about the process can help you research how to get it done.
“How Much Does Microfilm Scanning Cost?” describes the 9 factors that will affect the price you pay for microfilm scanning. If you’re starting to research microfilm digitization, this is a great place to start and get a ballpark budget idea.