Aperture cards are a type of microform created by inserting a microfilm image into a hole, or “aperture,” on a piece of cardstock. There are two kinds of aperture cards: Hollerith and standard (or non-Hollerith). Hollerith aperture cards have multiple hole punches on them that provide indexing and identification data. Standard aperture cards don’t have the Hollerith hole punches, but instead have the image index information in the title block on the top of the card.
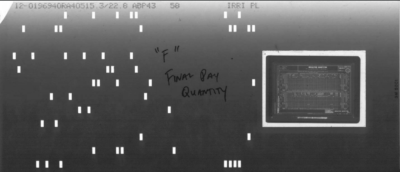
Hollerith Aperture Card
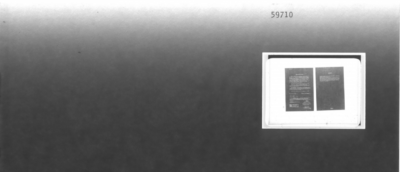
Standard (non-Hollerith Aperture Cards)
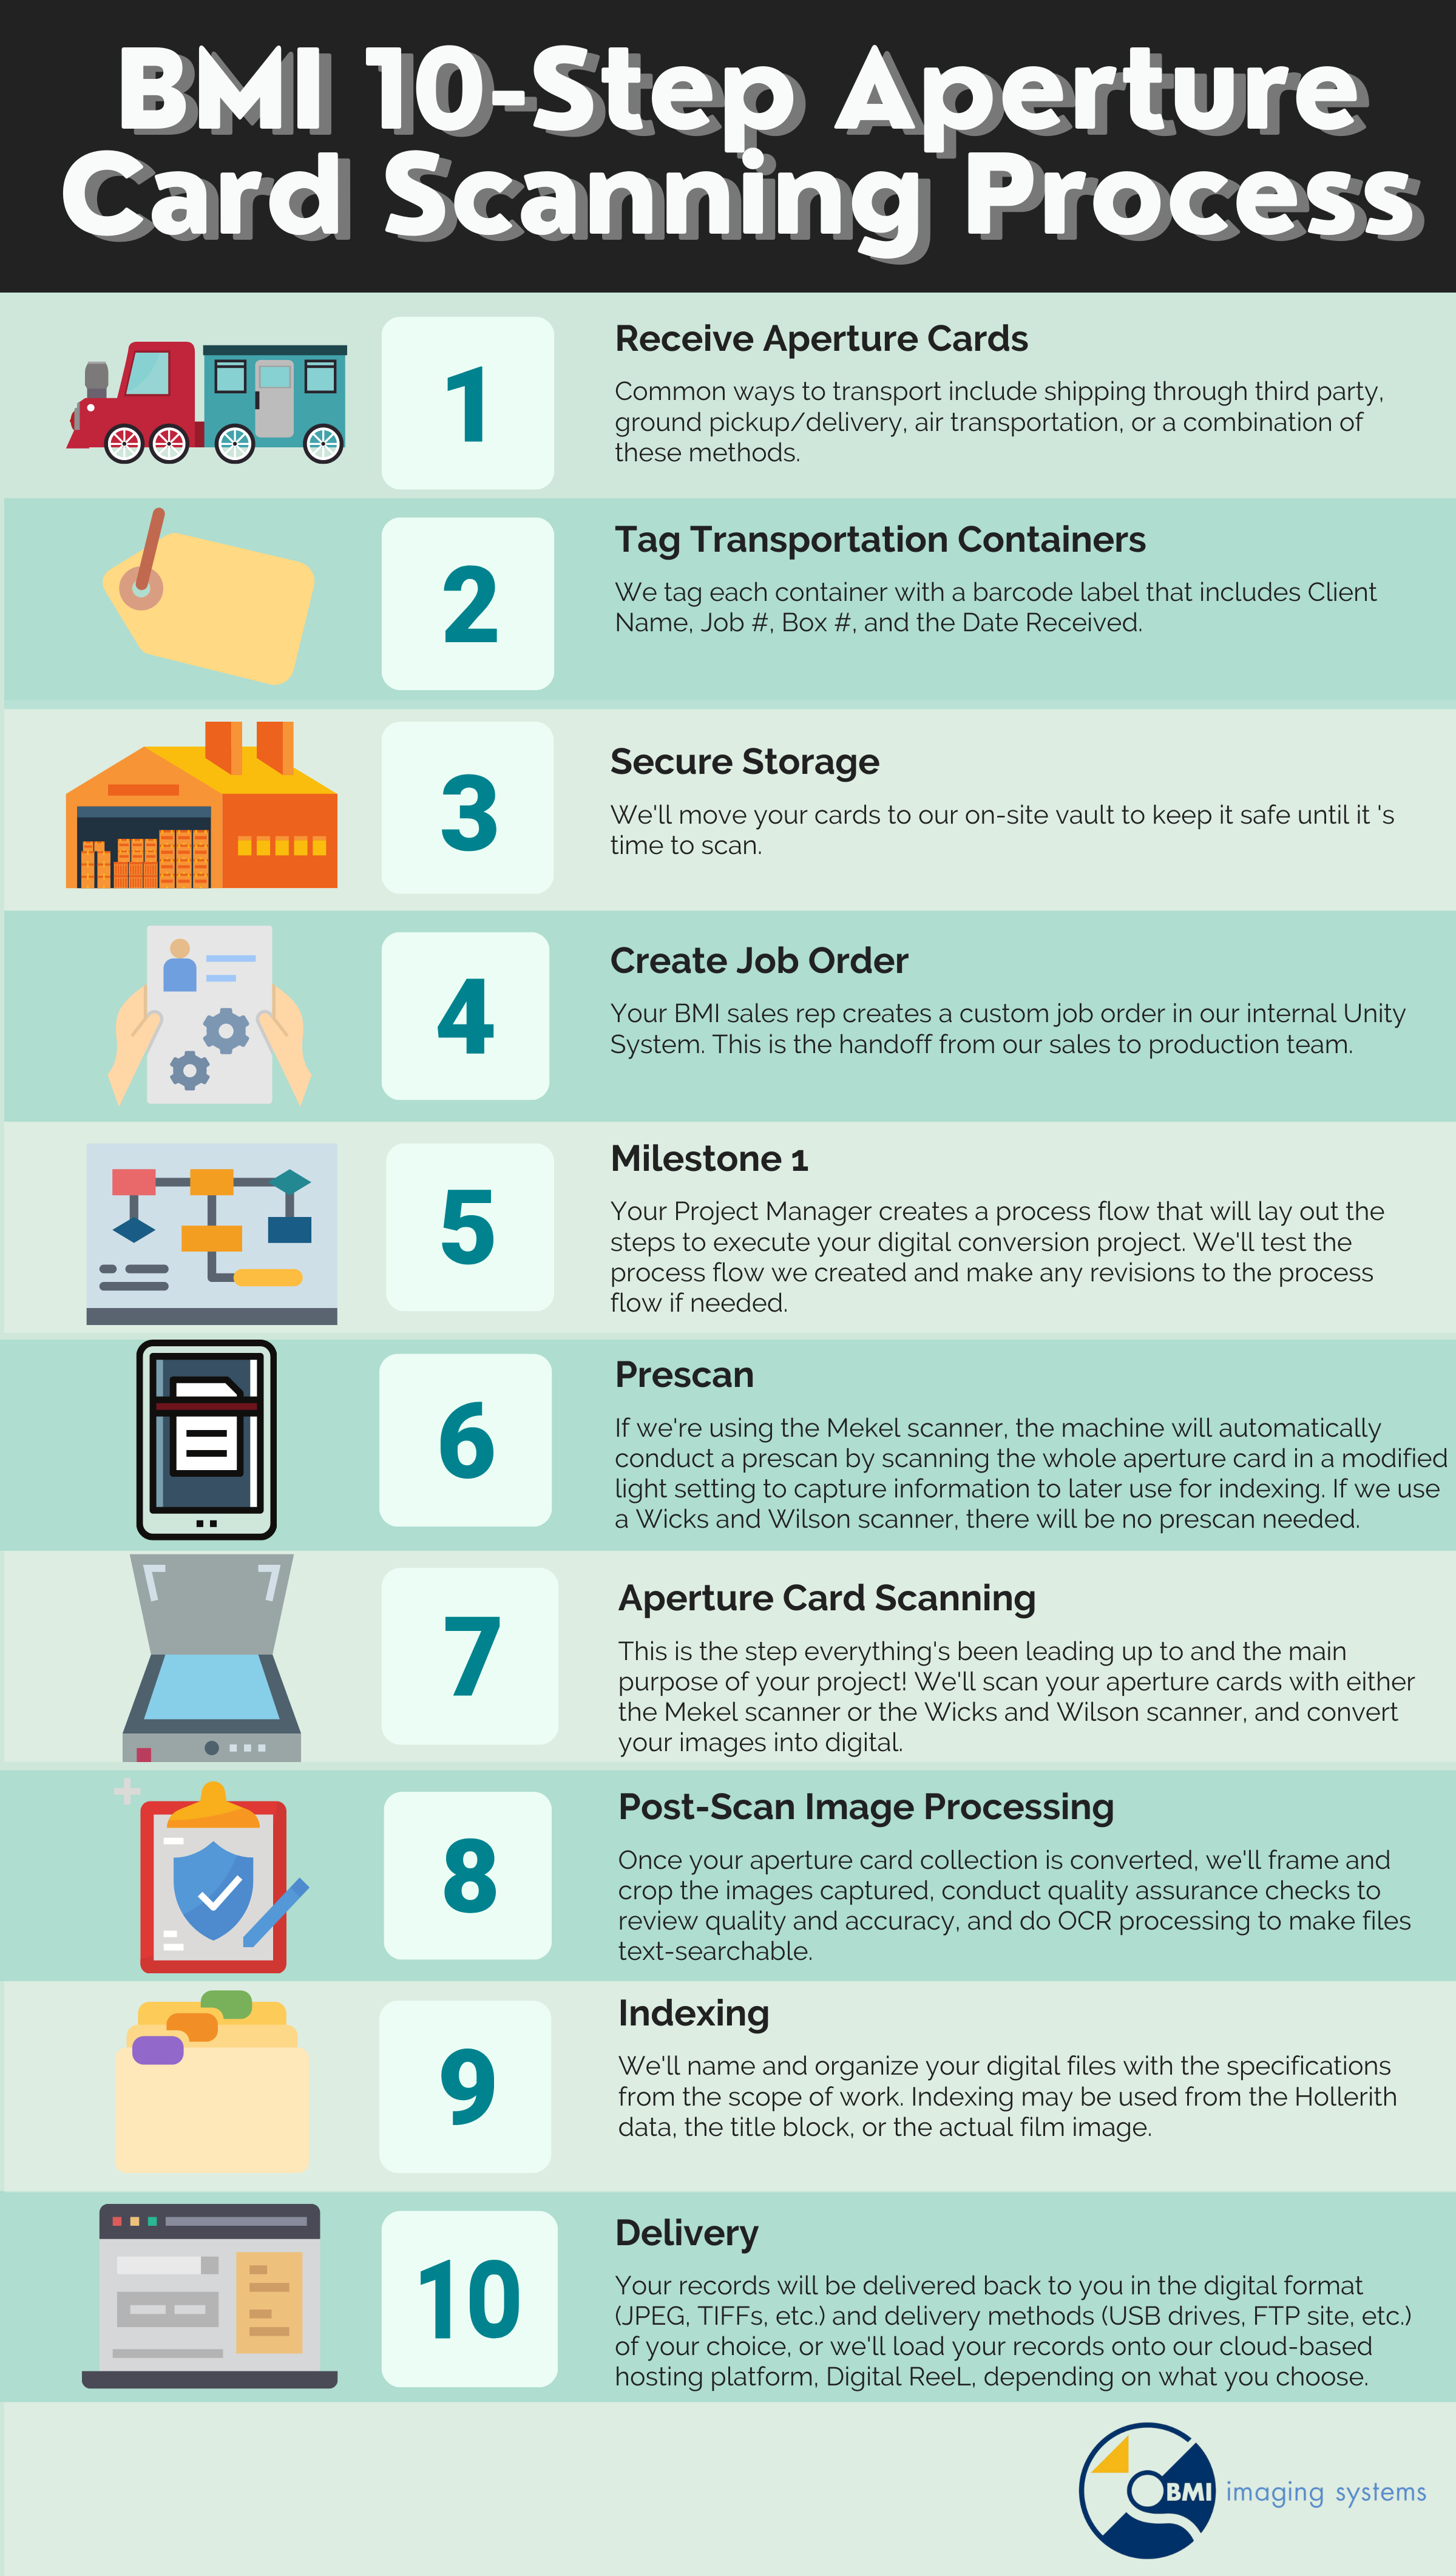
You might be thinking of scanning your collection to a digital format and want to know the process that’ll take your cards from physical records to electronic files. Each scanning company has its own distinct scanning process, but here’s our 10-step aperture card scanning process that outlines what you can expect if you choose to work with us for your digitization project.
Our process covers everything from transportation to digital delivery. Once you digitize your aperture card collection, you’ll have a modern and effective method to access your digital records. Let’s get into it!
Receive Aperture Cards
Before we’re able to scan your aperture cards, we’ll need to get your records to one of our secure scanning facilities. Your sales rep will work with you to plan out the transportation logistics during the scope of work and contract phase.
There are a couple of options that you can choose from, such as a third-party vendor, ground pickup and delivery using our vehicles, air transportation, or a combination of these methods. The options you choose will mostly be dependent on where you’re located. Read our article on microfilm and microfiche transportation to get a better idea of what transportation methods make the most sense for you. Even though the article focuses on microfilm and microfiche, the methods described in the article can be used for aperture card transportation as well.
Once you figure out your transportation method, you should start thinking about how to pack and organize your records for transport. You can check out our article on how to pack your microfilm for a scanning project. Once again, the article focuses on microfilm but the concepts can also be applied to aperture cards. The article outlines ways that you can pack and organize your microfilm so it’ll arrive at our facilities in a safe and organized manner. If the records arrive at our facilities in an organized manner and are labeled to match the project requirements, we can begin your project promptly once it arrives at our facilities and won’t have to waste time sorting the records ourselves.
Tag Transportation Containers
Once your aperture card collection reaches our scanning facilities, the first thing we do is tag each transportation container (banker’s box, plastic storage box, etc.) with your project’s details (your name, job #, box #, and the date received). This information is useful for internal document tracking purposes throughout your digital scanning project. Each tag also includes barcodes on them so our production team can easily scan the barcodes.
The information will be automatically populated into an internal system called MTS (“Material Tracking System”) to provide us with a record of what was received, how many boxes in total, and which of our employees received the material.
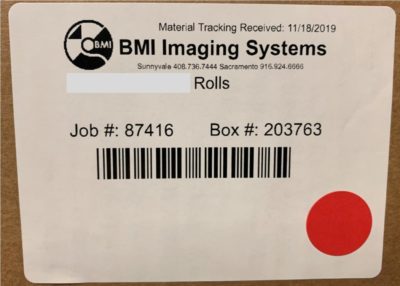
An example of a label we’ll use to tag your transportation containers with your project’s details.
Secure Storage
After we’ve labeled all your materials, we’ll move your collection to our secure storage area. We’ll leave your aperture cards in storage until it’s time to scan them. We only allow authorized individuals with the proper security clearance to access this storage area. We do this to ensure that your records remain protected and to prevent the wrong eyes from seeing your records.
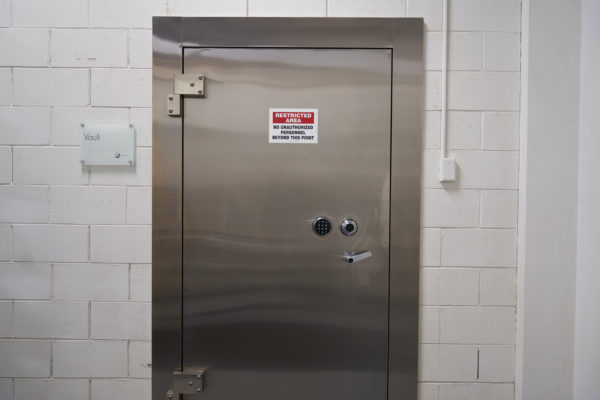
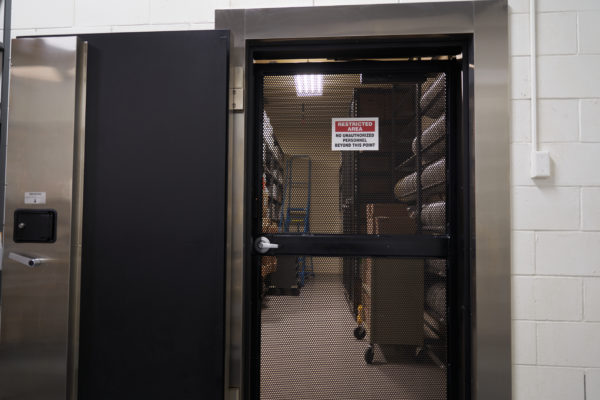
Our security vault where we’ll place your records.
Create Job Order
Before we get to the scanning portion of your project, your sales rep will create a custom job order based on the agreed-upon scope of work and contract. They’ll do this using our internal Unity System. The job order will outline the specifications of your project that the production team will use to process your aperture cards. Once they’ve created a job order, they’ll submit it to the Production team for approval.
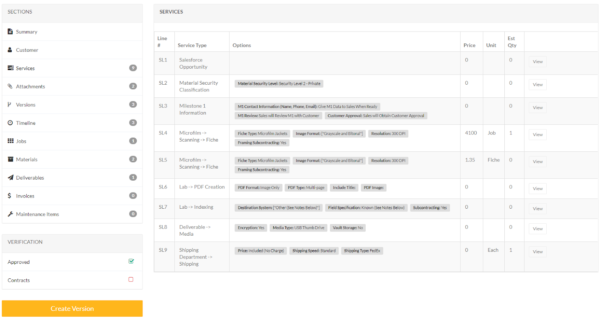
Screenshot of an actual project in our Unity System SOP portal.
Milestone 1 Proof of Concept
After the job order is created and approved, a small batch of the aperture cards will be scanned for the Project Managers to assess the materials. Once the Project Managers are able to see and assess the materials, they’ll start the Milestone 1 (M1) process using our build-test-refine methodology.
In the first part of the M1, the Project Manager will create a process flow that will lay out the steps to execute your digital conversion project. The process flow will cover every single step that your aperture cards will go through, from preparation, scanning, indexing, OCR, framing, and delivery.
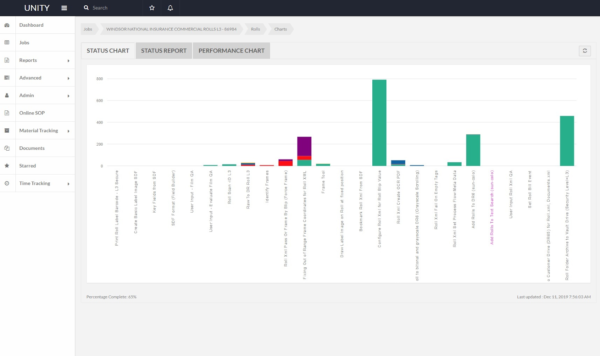
An example of a conversion project’s process flow in our internal Unity System.
After we’re done setting up the process flow, we’ll move on to the testing stage of the M1. We’ll do this by testing a small sample batch of your aperture cards collection with the process flow we’ve created. This step allows us to test if the process flow we’ve set up is right for your specific project. If there’s something that isn’t working as well as we initially thought, we’ll take the time to adjust the process flow. This step is critical because it allows us to make adjustments early on before we go into full production and it gives you a chance to see if you’re getting what you asked for.
If the sample batch-test did not pass the “stress test” or meet your expectations, we’ll make revisions until you’re satisfied with the conversion process flow. Once we get your approval, we’ll be able to start scanning the rest of your aperture card records.
Prescan
There are two different scanning machines for aperture cards: the Mekel scanner and the Wicks and Wilson scanner.
The Mekel scanner is used for both microfiche and aperture cards. If we’re using a Mekel scanner for your project, the machine will automatically conduct a prescan of your aperture card before scanning the film image.
Our scanning operator will first calibrate the machine with the specifications laid out during the M1. Next, they’ll put in a batch of aperture cards, normally around 5-10 cards. The scanner will then complete a “prescan” of an aperture card before moving onto the next card in the batch. In the “prescan” step, the Mekel scanner will scan the whole aperture card image in a modified light setting. It does this to capture the metadata to later use for indexing purposes.
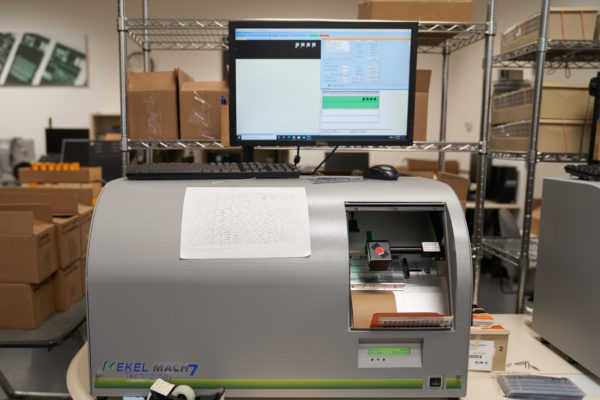
A Mekel scanner.
If your aperture cards have Hollerith data that’s able to be captured using a Wicks and Wilson scanner, there will be no prescan needed. The scanner operator doesn’t even need to calibrate the machine beforehand. They can simply place a stack of aperture cards into the rubber stopper and go straight to the main aperture card scanning portion of the project.
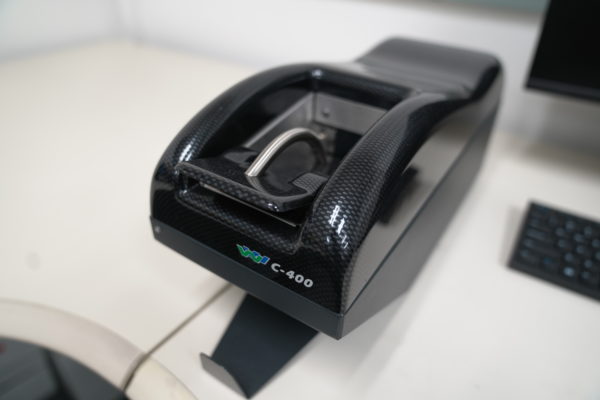
A Wicks & Wilson scanner.
Aperture Card Scanning
And now, we’re finally at the aperture card scanning step! As mentioned before, there are two methods of aperture card scanning depending on the type of aperture card and what the clients want and need.
With the Mekel scanners, it can scan both Hollerith and standard aperture cards. Once the Mekel completes the prescan step, it’ll scan each card in a regular light setting and then move on to the next card until all the aperture cards in the batch are scanned.
With the Mekel, you’ll get bitonal, grayscale, and high-definition images. You’ll also have title strip information from the prescan. The downside of scanning with a Mekel scanner is that it’ll be a slower process because it captures the entire card instead of just the film image, and requires the scanning operator to operate the machine more attentively. If you don’t have Hollerith cards with the hole-punch data, and we need to capture the indexing information from the title strip, the Mekel is the best choice. Even if you have Hollerith cards but want to see the entire card image for original context, the Mekel is the unit we’ll use.
The Wicks and Wilson scanners will scan both Hollerith and standard aperture cards. However, with standard aperture cards, indexing information will need to be captured directly from the film image because of the lack of Hollerith data. This method of indexing can be expensive if the images are not consistent, or the indexing information is difficult to locate on the image.
With the Wicks and Wilson scanners, the scanning operator will first load a stack of aperture cards onto the rubber stopper. The roller on the machine will pull the aperture cards one by one, read the Hollerith data on the card if there’s Hollerith data, and then push the card out. This method will scan your cards in a very short amount of time.
Once the machine is done scanning your aperture cards, you’ll get the images from the scans as well as an output in the form of a text file. Critically, Hollerith data does not always read perfectly! Even if you have Hollerith cards, sometimes the hole punches won’t be captured so that card will not have an index value. Because this is something we’ve worked with before, we often suggest having a backup indexing method to capture the data from the film image, if the Hollerith data doesn’t read.
Post-Scan Image Processing
Once we’re done scanning your aperture cards, we’ll move on to the post-scan image processing steps. Some of the post-scan image processing steps are optional depending on your needs. For example, if you don’t need text-searchable digital files, we won’t run your images through our OCR text-search software.
Framing
One of our post-scan processes is framing and cropping the images that were scanned. When we say we’re “framing” an image, it means to only capture the images on the aperture card and not the background around it. We do that by cropping the image to the original document that was photographed and microfilmed. Most aperture cards are 35mm images (one image per card) but we do see cards that have multiple 16mm images in one frame. When this is the case, framing can be essential to make sure that you’re getting each individual image framed separately.
Quality Assurance Checks
One of the most important steps after we’re done with the scanning portion is our quality assurance step. In this step, we review our work to ensure that we accurately captured the film images. If something doesn’t pass our QA checks, we’ll rescan the cards that failed to see if we can fix the issue.
Optical Character Recognition (OCR) & Text Search
If you want to make your digitized files text-searchable, then you may choose to apply OCR. We’ll run your newly digitized files through our OCR software to capture characters and data. Once the software is done processing the data, you’ll be able to search your files using keywords and phrases to locate what you need.
Indexing
After the post-scan processing steps, we move forward with indexing and organizing your digital files with the specifications that you’ve laid out in the scope of work. If we scan your aperture cards with the Mekel scanners, we’ll most likely use the data captured from the title strip during the prescan, or potentially the data from the film image if it was specified. If we use the Wicks and Wilson scanners to digitize your aperture cards, we’ll use the text file format created from data of the Hollerith or the actual image itself.
With both methods of indexing, the information will be processed in a separate data entry process. Indexing is an important step in your scanning project because it’ll make it easier for you to search and locate your records when you need them.
Delivery
Once we’ve completed your aperture card conversion project, the last step will be to deliver your scanned aperture card collection back to you in the digital format (PDF, JPEG, TIFFs, etc.) and delivery methods (USB drives, FTP site, etc.) that you want.
Digital ReeL
If you choose to work with us, you’ll have the option to host your newly digitized aperture cards collection in our cloud document management system, Digital ReeL. We’ll import your digital records into the application and organize your files within the application for you. With Digital ReeL, you’ll be able to access your records from anywhere as long as you have an internet-connected device. The application has search capabilities and built-in image enhancement tools to help with image quality and record retrieval.
Next Steps
Reach out to us today! Click the “Get Your Quote” button below, fill out the form, and we’ll quickly reply to you to discuss your project.
Further Reading
To learn some more about aperture card scanning, take a look at these articles:
“All About Aperture Cards” goes in-depth about the records storage medium. It defines and illustrates the various types of aperture cards.
“How Much Does Aperture Card Scanning Cost?” provides a general price range for aperture card scanning. It describes the various cost factors that affect the project pricing, from the desired resolution, indexing specifications, and output formats.
“How Much Microfilm And Microfiche Do I Have?” includes a section about how to estimate the quantity of your aperture cards collection. Knowing the number of aperture cards you have is important because it will impact your project timeline and pricing.

